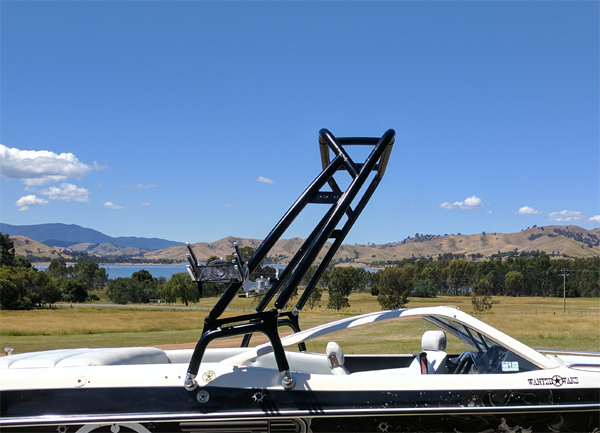
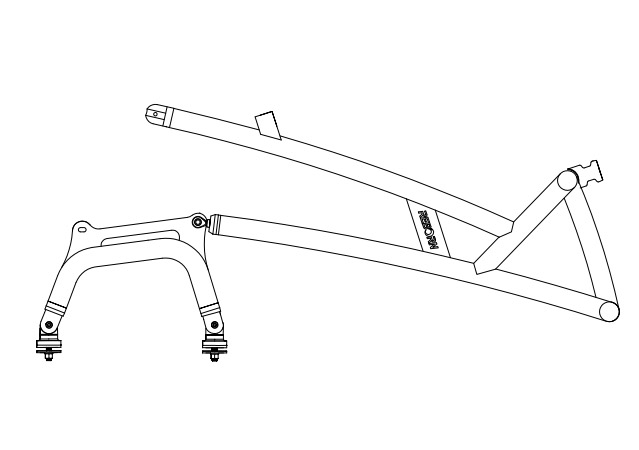
Our Reborn Launch Wakeboard Tower uses many common parts with unique design features that make it affordable, adjustable, and easy to install, fast to fold down and erect. Nice designed bracket to hold the tower stay at the position for storage. It is a forward-facing design and there are five main components -- Top Section, Left Leg, Right Leg, side bars and mounting bases.
IMPORTANT NOTES FOR INSTALLING,MAINTAINING AND USING YOUR TOWER
For a High Quality, Trouble Free Installation, read the entire Installation Manual completely before you begin
Note that this ins ation guide is only a guideline. Each boat is different and improvisation is needed to mount your tower on your boat.Following all the installation instructions will give you a professional installation look. If you are not good at it, we advise you to have your tower mounted by a professional who has experience in boat constructions and mounting other towers.
An important part of the installation is strengthen the nuts in the tower to lock the legs into a position custom to fit your boat,all hardware is to be hand tightened.Do not use air tools or electric drills to tighten hardware. Our quick release knobs will allow you to fold the tower for storage. You can fold your tower to the front of your boat.
Note that after drilling the locking holes in the top section, the tower leg span (width) is permanently set and cannot be moved to another boat unless it has the same width.
The tower is silent by design. If you hear any rattling or noise, check all hardware for tightness. Please contact us if you continue to hear any rattling or noise before using the tower. This means something is not installed correctly.
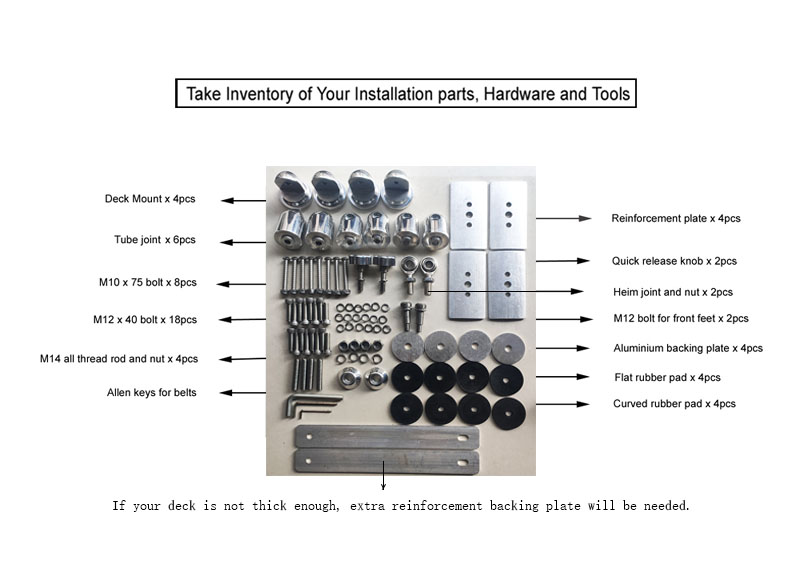
Contents of Box Inspect the package for missing or damaged parts caused by shipping.Including the five main components and followed accessories.
Begin Installation
During installation, you should protect the tower by doing all the layout of the tower on a tarp, blanket or carpet and leave as much plastic wrapping on the legs and top section as possible. Protect the general mounting area of your boat by covering it with a tarp or blanket. Use masking tape to protect your deck from scratches as you determine the location of the four bases.
Note: Please remove black rubber cap at pipe end, THIS IS PACKAGING ONLY!
Step 1:
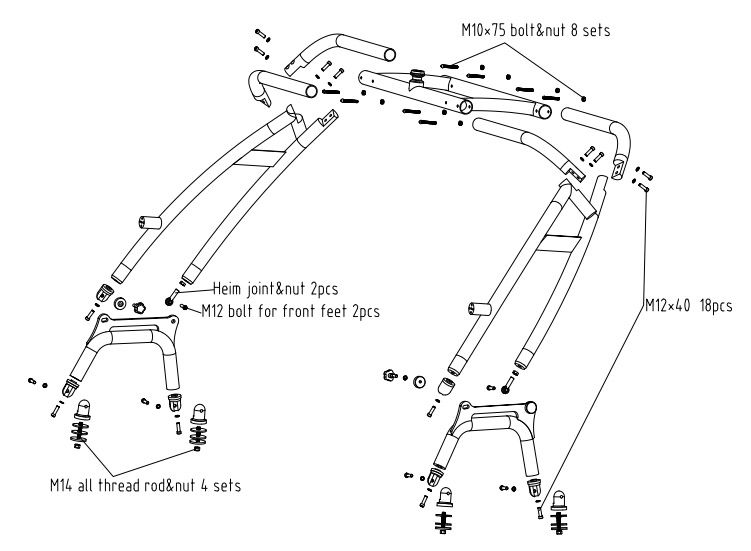
Following the exploded drawings and assemble the tower on the ground. You will not be drilling any holes in the tower at this point, and don't tighten any bolt at this stage.
Step 2:
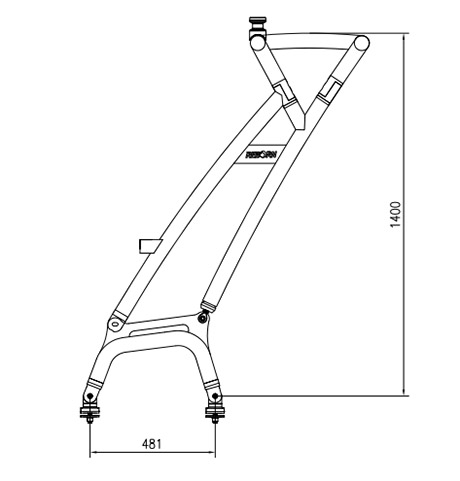
Using the measurements from the elevation drawing identify where the best place is to fit the tower on your boat.
Step 3
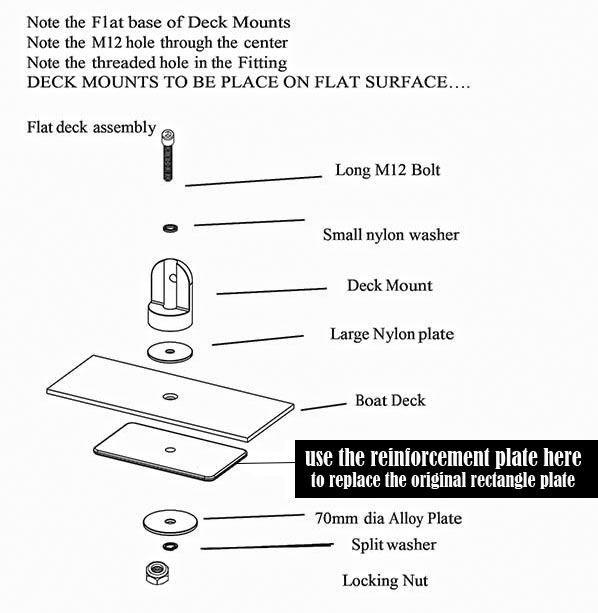
Attach the deck mount to the boat. Cover the area where the base mounts will be
placed with masking tape. This should be done in all areas where the tower will
be mounted and the near surrounding area. This will help eliminate scratches to
your boat while adjusting and measuring your tower.

Care and Maintenance
1. Be sure to check and retighten all bolts and connections prior to every use.
2. Be cautious when towing or driving under obstacles, low hanging structures or trees with your tower mounted.
3. When the tower is folded, always use a vest or other cushion to protect your boat where the tower and boat touch each other
4. Use soap and water or general cleaners to clean your tower. Avoid abrasive materials that might scratch the tower's surface.
5. Always rinse tower after touching salt(brackish) water.


