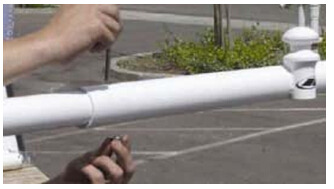
As you are taking the front upper legs and top center section out of the box, place masking tape strips around the narrow top conjunction sections of the tubes that slide inside. This allows you to move and adjust the front tower tubes without scratching the surface. But please use caution when sliding the sections together
Keep the masking tape in place through the final assembly step, then, after drilling, remove the masking tape and your finish will be perfect.
Note that this installation guide is only a guideline. Each boat is different and improvisation is needed to mount your RBA wakeboard tower on your boat.
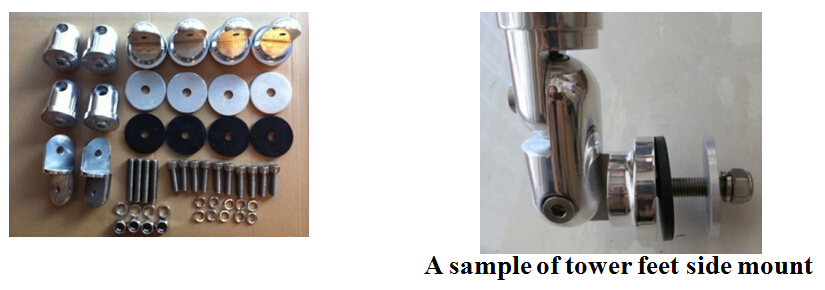
Contents of Box
Unpack the carton

Prior to assembly, make sure all the required parts are present.
Necessities :
Electric Drill
Drill bit size 12 and 10
Fork wrench
Masking tape
Chamfer drill bit
First decide if you want to do a top mount or a side mount.
VERY IMPORTANT NOTE:
1. Please remove the rubber caps of each leg, it is
packaging material which MUST NOT be used for installation, or it will lower the tower strength.
2. Please DO NOT remove the plastic sleeves inserted in the H top section, they can prevent scratching when you insert tower arms into the top section.
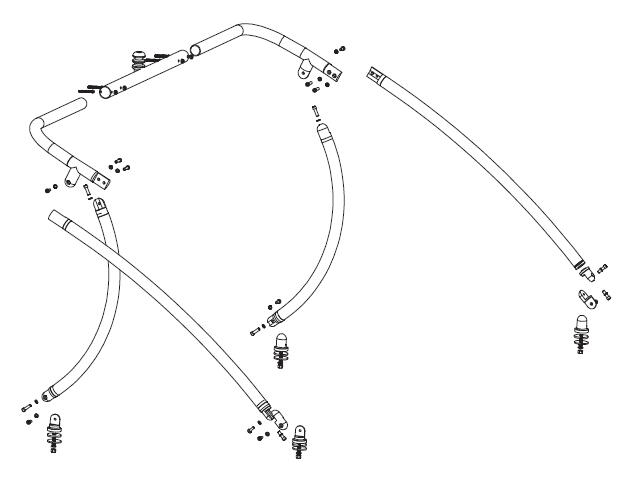
EXPLODED VIEW OF THE ORIGIN TOWER FOR YOUR REFERENCE
Step 1
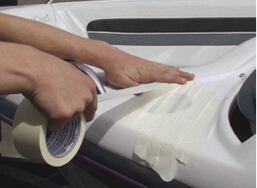
Cover the area where the mounting brackets will be placed with masking
tape. This should be done in all areas where the tower will be mounted
and the near surrounding area. This will help eliminate scratches to your
boat while adjusting and measuring your tower attachment points.
Step 2
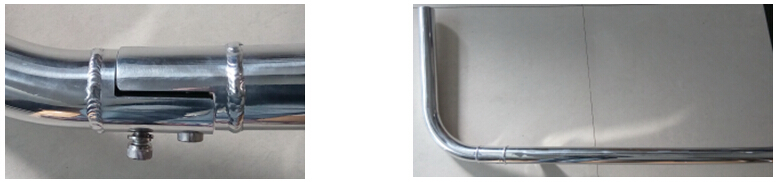
Connect the front upper and lower legs together using the M12 bolts and joints as shown in right picture.
Step 3
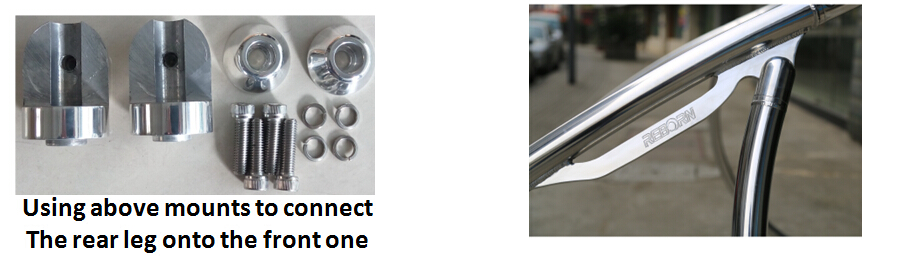
Attach the rear leg to the front legs with mounting brackets and M12 bolt, all mounts are swivel to assure that the tower will be aligned evenly and your feet will be squarely positioned and fits most secure.
TIP: You can use Petroleum Jelly (Vaseline®) to grease the rubbers of the tower leg joints to prevent the rubbers from drying and it helps to insert the tower leg joints easily. Always apply a thin film of Anti-Seize lubricant on all the male threads of the stainless steel hardware. This prevents the stainless steel hardware
from galling and locking. Check/tighten the screws regularly before use.
Step 4
Use the semi-assembled tower to determine the correct position on the boat. Place the parts beside the boat to see what it will look like. Bear in mind the height in the boat, the windscreen window, additional tower accessories, wiring etc… The closer the front and the rear mounts are placed together, the higher the tower will be. When you have determined the correct position mark the position on the masking tape using the rubber gasket. After marking one side you can mark the other side using the rubber gasket . Make sure to make the rubber gaskets on the direct opposite of
the boat using fixed reflection points of the boat.
Make sure the rubber gasket are mounted completely level!
TIP : start +/- 20cm in front of the windscreen to determine the
correct position.
This to ensure a possible mirror mount on the tower.

Step 5
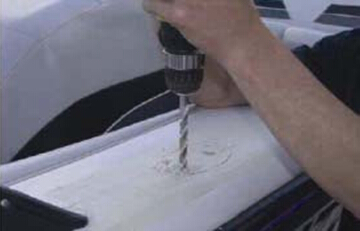
Before drilling inspect the other side of these locations for
obstructions such as wires or cables and accessibility. You are now
ready to drill the holes. For this use the drill bit size 5/8. After drilling
the 4 holes, it is recommended to chamfer the holes using the
chamfer drill bit, this prevents the gel coat from cracking.
Step 6
IMPORTANT: When the BOAT DECK is less than 8mm thick we strongly advise to reinforce the mounting bracket with wood or fiberglass cloth. This prevents stress on the boat which Causes the gelcoat to crack.
WARRANTY DOES NOT COVER: Any cracks or other damage to the gel coat or boat because of mounting the tower.
Step 7
Remove the masking tape and mount the mounting brackets with the rubber gasket. Don’t fasten the screws at this time
Step 8
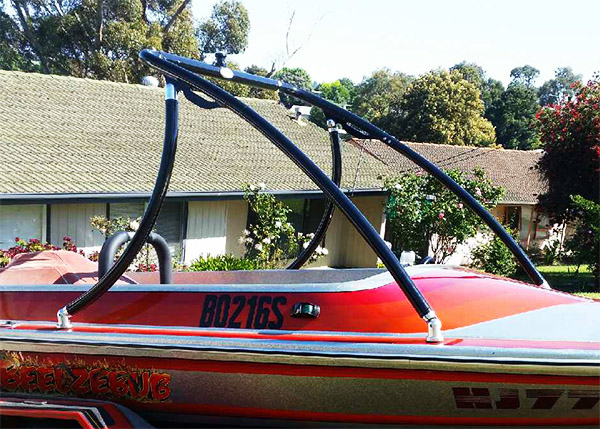
Mount the front bar and the rear bar on the assembled mounting brackets, after that slide the overhead bar on the front bar with the towing point facing backwards.
Step 9
On the other side of the boat, slide the front bar in the top cross
bar and attach it to the mounting bracket, after that you can also
connect the rear bar to the mounting bracket. Make sure that
the tower is in the correct position and that the towing point is
centered and facing upwards.
NOTE:
1. When you have a narrow boat you probably need to shorten the
overhead bar to make the tower fit to your boat.
2. Please DO NOT remove the plastic sleeves inserted in the H top section, they can prevent scratching when you insert tower arms into the top section.
Step 10
Fasten the top cross bar. In order to do this you have to drill holes
through the top cross bar (these are predrilled) and the front bar, then
fasten it with the 4 big bolts & nuts.
Step 11
If the tower is in the correct position you can fasten all the bolts and screws.
How to fold the tower
I. Disconnect tower from rear mounts
II. Loosen the front mounts
III. Fold tower back to down position
Care and Maintenance
I. Be sure to check and tighten all fasteners and connections prior to every use.
II. Be cautious when towing or driving under obstacles, low hanging structures or trees with your towers on.
III. Use soap and water or general cleaners to clean your tower. Avoid abrasive materials that might scratch the tower’s finish.
IMPORTANT NOTE FOR INSTALLATION
The construction of your boat, design of the deck, thickness of deck and walls and overall design may cause movement at the mounting points. If the construction of you boat causes movement at the mounting points or incorrect mounting location creates added pressure on joints increasing movement of the tower it voids warranty. If in doubt do not install the tower or seek a professional to install for you.
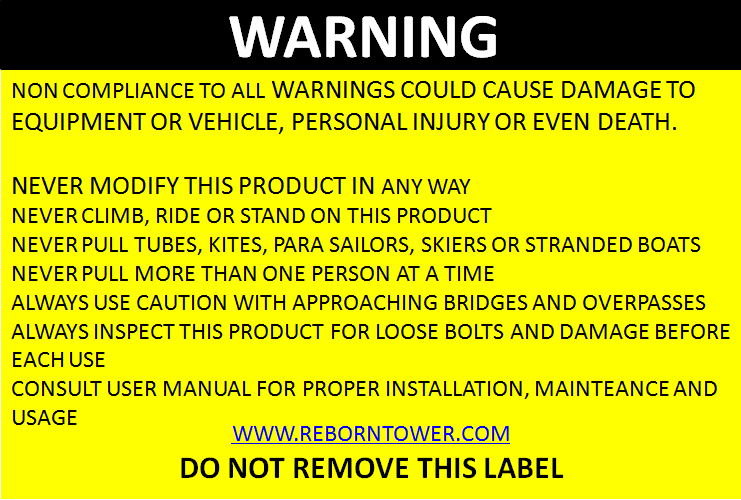
Always read the warning labeled on the tower prior to each use.